目录

capa things 02

使用几篇文章来详细介绍一下capa这款工具的原理、使用和在现实生产环境中的利用。

capa thins 02

capa 基本使用

capa 的 help 信息如下:

 1
 2
 3
 4
 5
 6
 7
 8
 9
10
11
12
13
14
15
16
17
18
19
20
21
22
23
24
25
26
27
28
29
30
31
32
33
34
35
36
37
38
39
40
41
42
43
44
45
46
47
48
49
50
51
52
53
54
55
56
57
(base) PS C:\Users\v4le1an\Desktop\tmp> .\capa.exe --help
usage: capa.exe [-h] [--version] [-v] [-vv] [-d] [-q] [--color {auto,always,never}] [-f {auto,pe,dotnet,elf,sc32,sc64,freeze}]
                [-b {vivisect,binja,pefile}] [--os {auto,linux,macos,windows}] [-r RULES] [-s SIGNATURES] [-t TAG] [-j]
                sample

The FLARE team's open-source tool to identify capabilities in executable files.

positional arguments:
  sample                path to sample to analyze

optional arguments:
  -h, --help            show this help message and exit
  --version             show program's version number and exit
  -v, --verbose         enable verbose result document (no effect with --json)
  -vv, --vverbose       enable very verbose result document (no effect with --json)
  -d, --debug           enable debugging output on STDERR
  -q, --quiet           disable all output but errors
  --color {auto,always,never}
                        enable ANSI color codes in results, default: only during interactive session
  -f {auto,pe,dotnet,elf,sc32,sc64,freeze}, --format {auto,pe,dotnet,elf,sc32,sc64,freeze}
                        select sample format, auto: (default) detect file type automatically, pe: Windows PE file, dotnet: .NET PE file,
                        elf: Executable and Linkable Format, sc32: 32-bit shellcode, sc64: 64-bit shellcode, freeze: features previously
                        frozen by capa
  -b {vivisect,binja,pefile}, --backend {vivisect,binja,pefile}
                        select the backend to use
  --os {auto,linux,macos,windows}
                        select sample OS: auto (detect OS automatically - default), linux, macos, windows
  -r RULES, --rules RULES
                        path to rule file or directory, use embedded rules by default
  -s SIGNATURES, --signatures SIGNATURES
                        path to .sig/.pat file or directory used to identify library functions, use embedded signatures by default
  -t TAG, --tag TAG     filter on rule meta field values
  -j, --json            emit JSON instead of text

By default, capa uses a default set of embedded rules.
You can see the rule set here:
  https://github.com/mandiant/capa-rules

To provide your own rule set, use the `-r` flag:
  capa  --rules /path/to/rules  suspicious.exe
  capa  -r      /path/to/rules  suspicious.exe

examples:
  identify capabilities in a binary
    capa suspicious.exe

  identify capabilities in 32-bit shellcode, see `-f` for all supported formats
    capa -f sc32 shellcode.bin

  report match locations
    capa -v suspicious.exe

  report all feature match details
    capa -vv suspicious.exe

  filter rules by meta fields, e.g. rule name or namespace
    capa -t "create TCP socket" suspicious.exe

对其中几个比较重要的参数做个啰嗦的解释:

  • -v/vv: 输出详细的分析结果,这里的详细会包每个 rule 命中的上下文和具体的数据。
  • -f: 设置待分析文件的格式,默认情况下是自动检测。
  • -r: 指定使用的规则,默认使用内嵌的 capa-rules ,但是因为 capa 支持自定义规则,所以可以在这里指定使用的自定义规则。
  • -j: 输出 json 格式。这里需要注意的是 -v/vv和-j参数同时用的时候,-v/vv 不生效,因为 json 输出的信息已经很全了。

capa 结果分析

下面使用一个简单的例子快速过一遍 capa 的分析结果。

默认输出

1
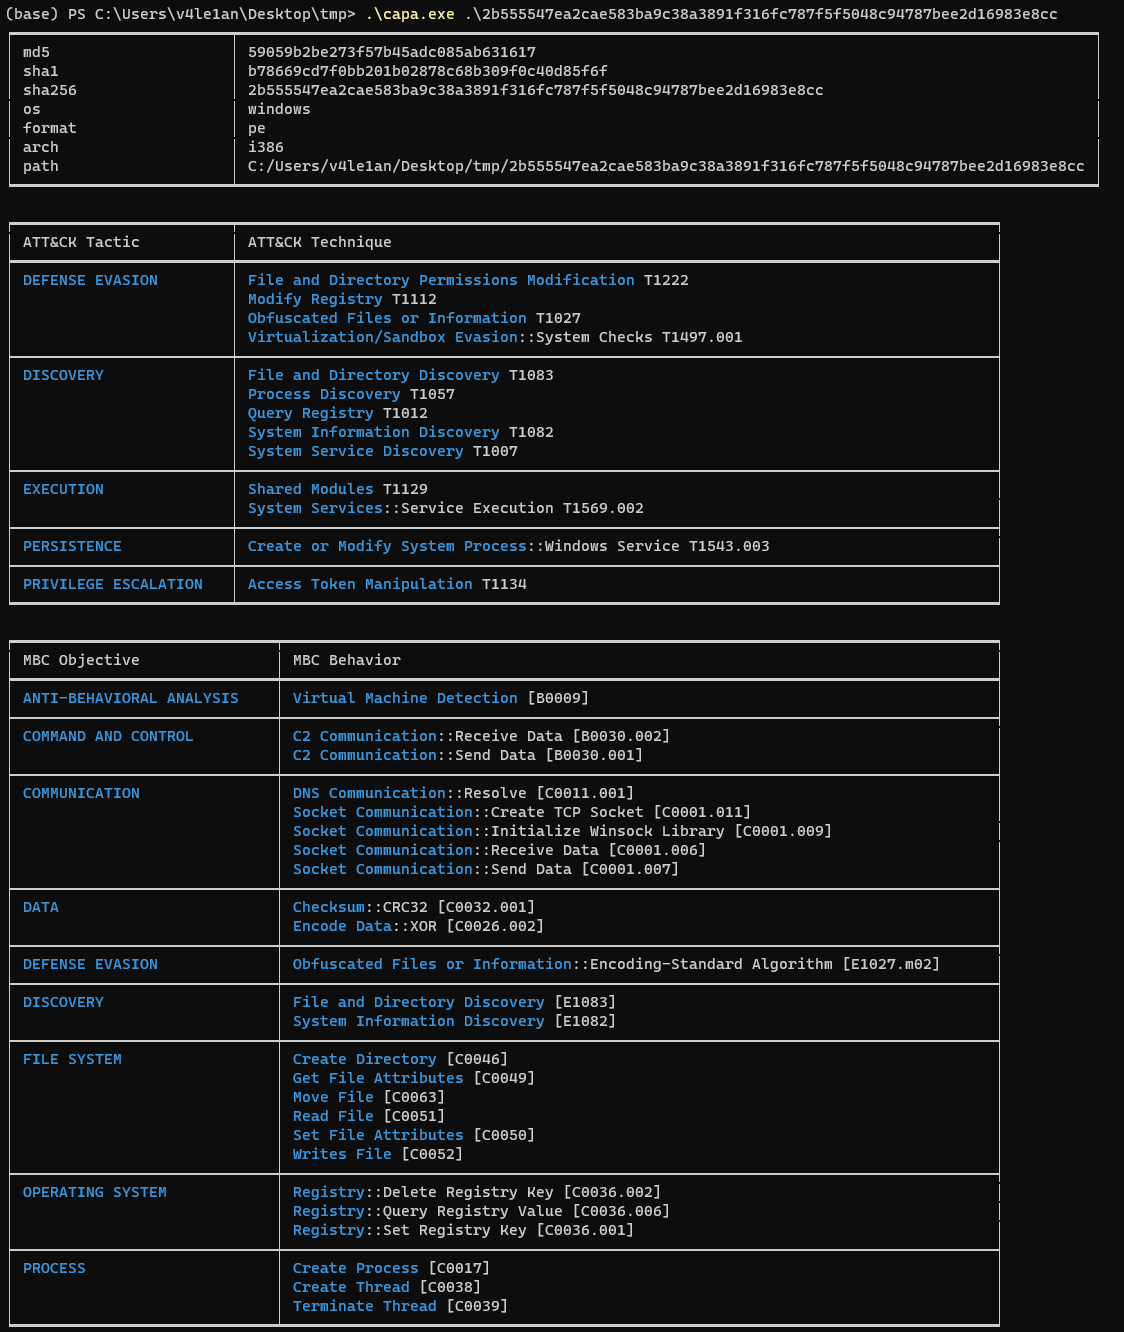
(base) PS C:\Users\v4le1an\Desktop\tmp> .\capa.exe .\2b555547ea2cae583ba9c38a3891f316fc787f5f5048c94787bee2d16983e8cc

上面的命令不加任何参数,输出如下:

https://raw.githubusercontent.com/AlexsanderShaw/BlogImages/main/img/2023/202309081628941.png

https://raw.githubusercontent.com/AlexsanderShaw/BlogImages/main/img/2023/202309081629562.png

我们拆解一下各部分输出。

第一部分

https://raw.githubusercontent.com/AlexsanderShaw/BlogImages/main/img/2023/202309081626514.png

这里包含一些文件的基本属性信息,文件hash、运行的os、架构还有文件的完整路径。

第二部分
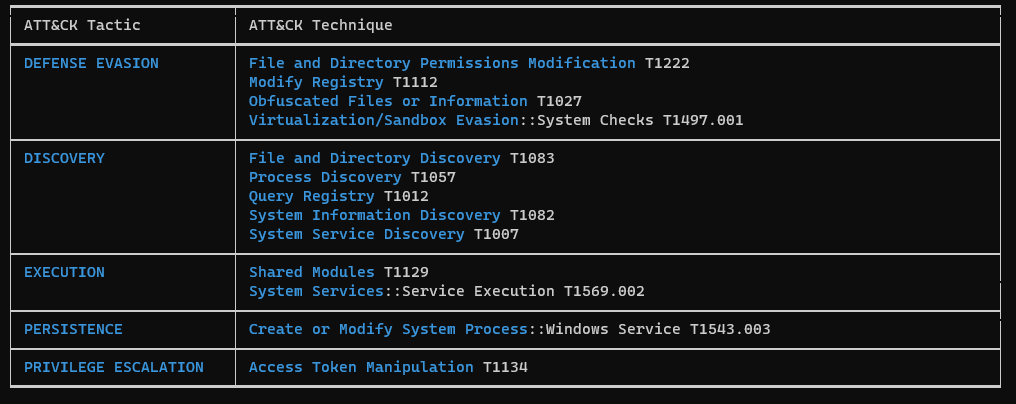
https://raw.githubusercontent.com/AlexsanderShaw/BlogImages/main/img/2023/202309081631391.png

第二部分包含的主要是 ATT&CK 的各项 TTP ,有具体的分类、描述和 ID,这对于我们梳理样本的 TTP 信息十分有用。而且,VT 也使用了 capa 的 ATT&CK 解析的结果。
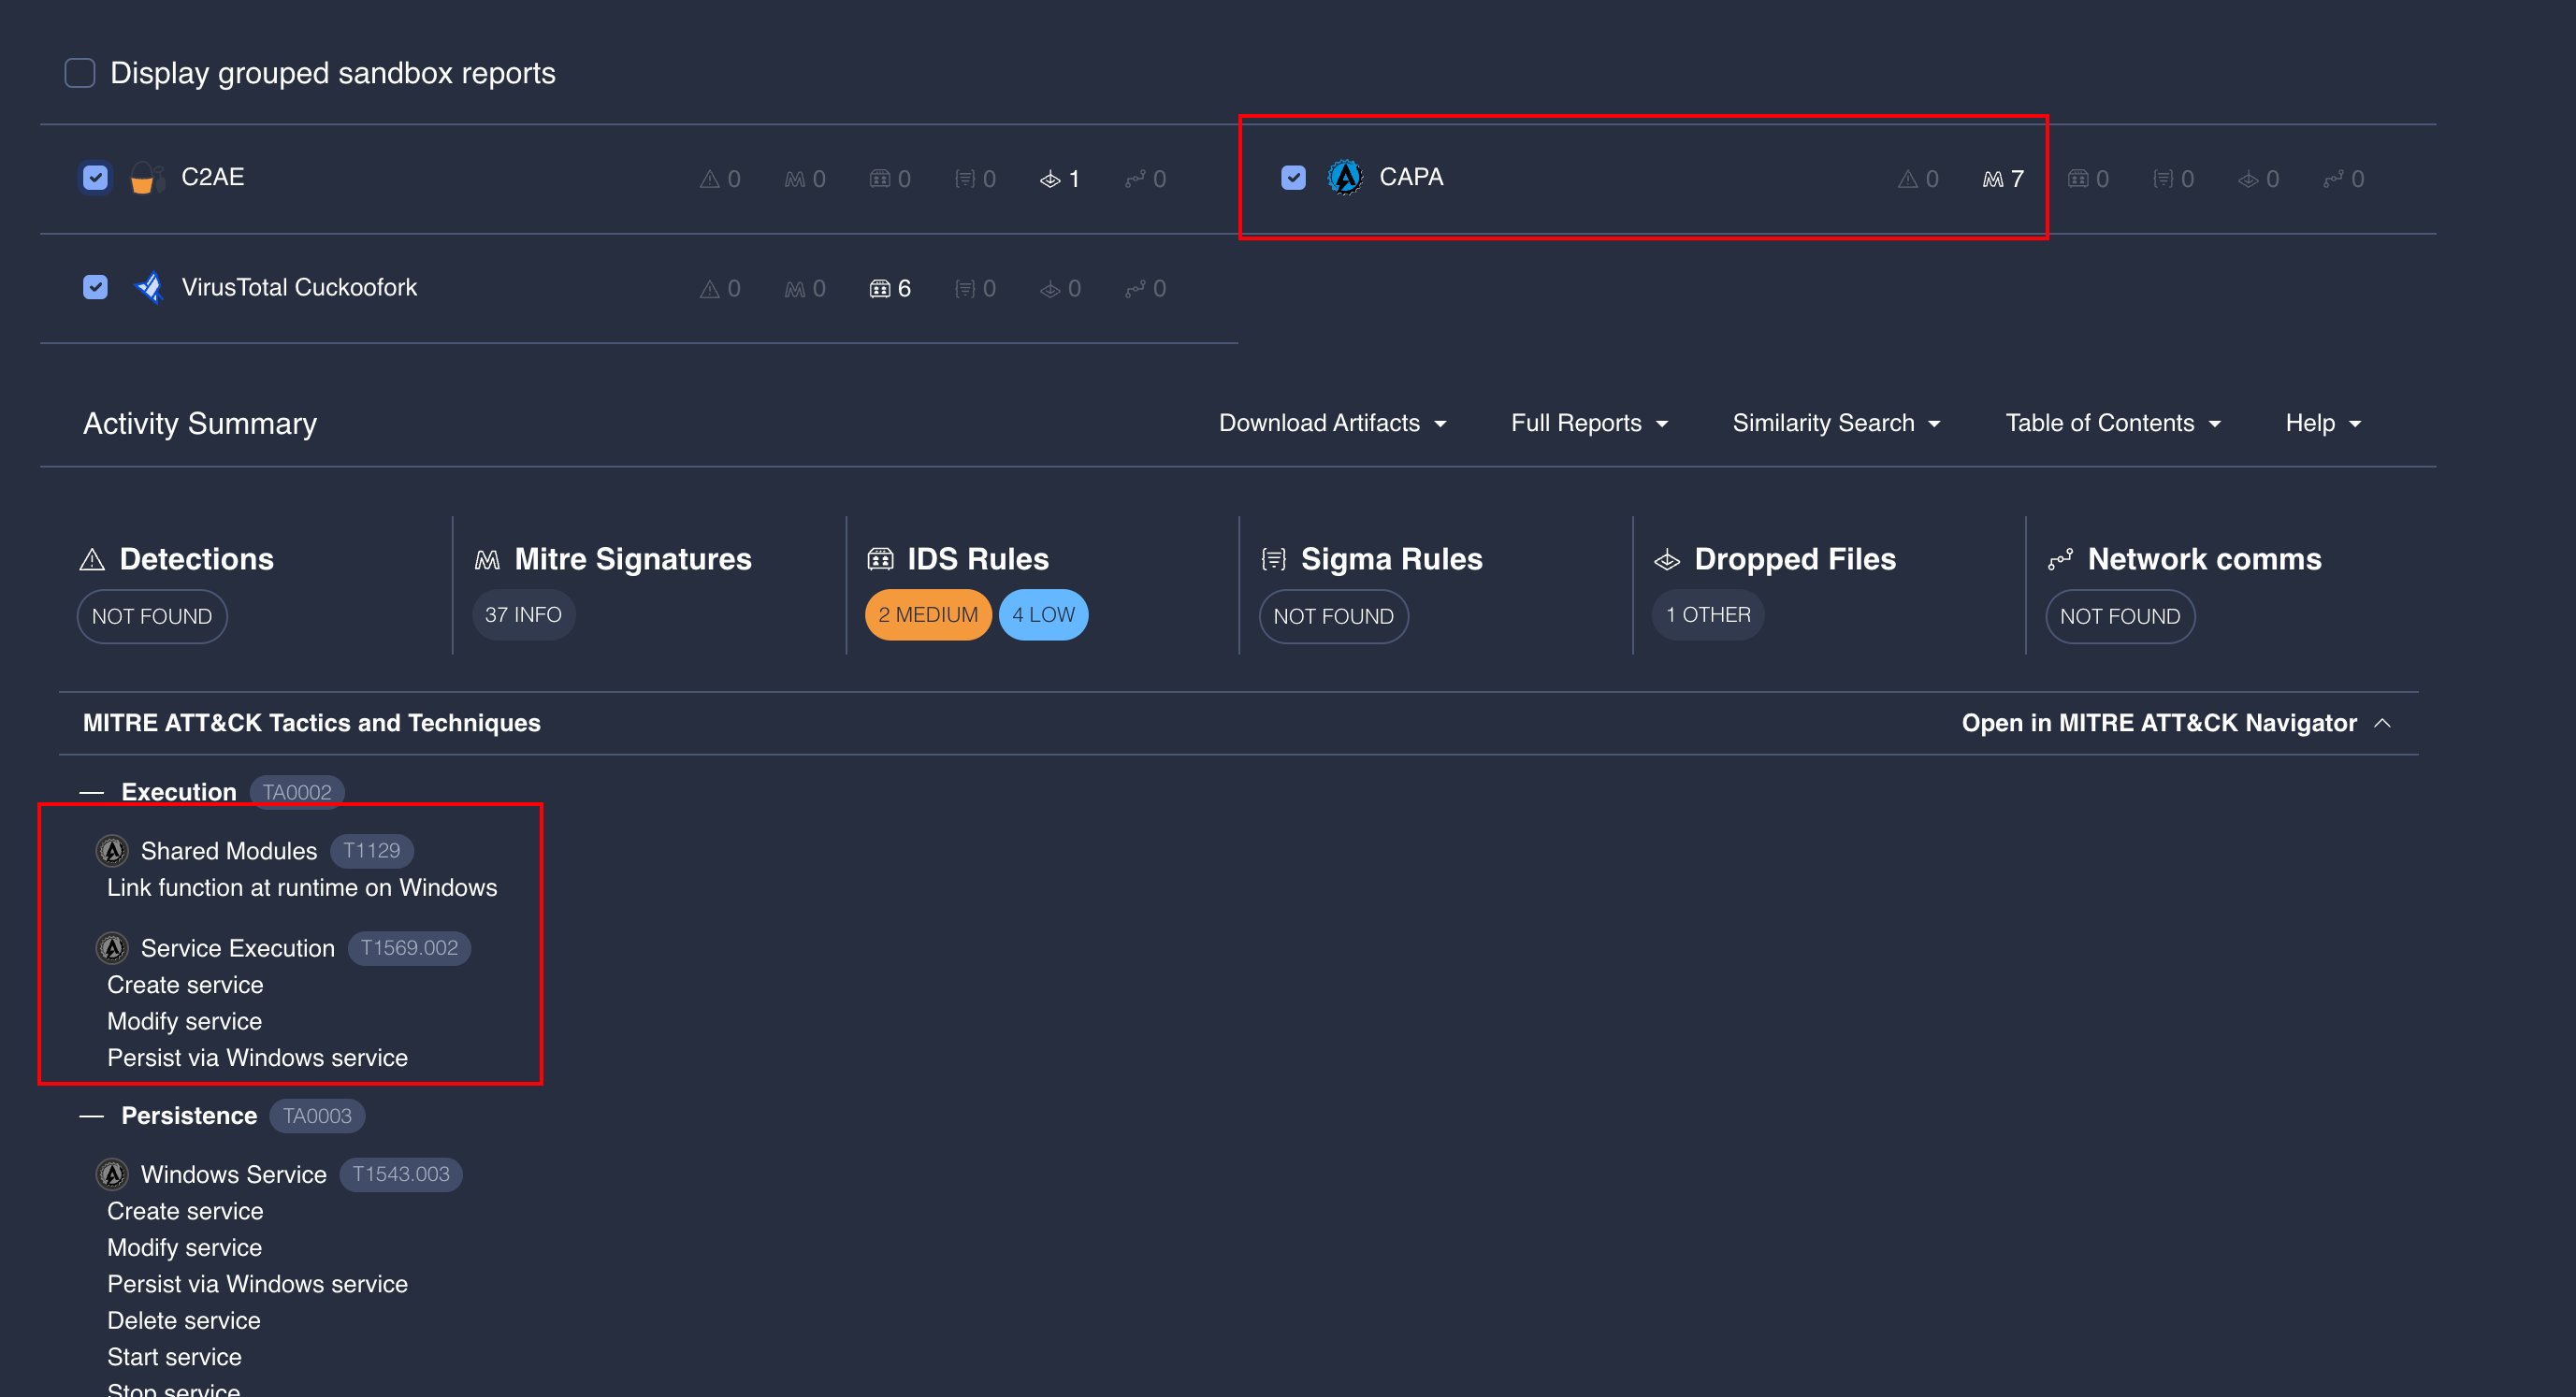
https://raw.githubusercontent.com/AlexsanderShaw/BlogImages/main/img/2023/202309081635734.png

但是经过测试发现,VT 的解析结果和使用 capa 在本地的测试结果存在不一致,猜测是使用了不同的 ATT&CK 版本。

第三部分
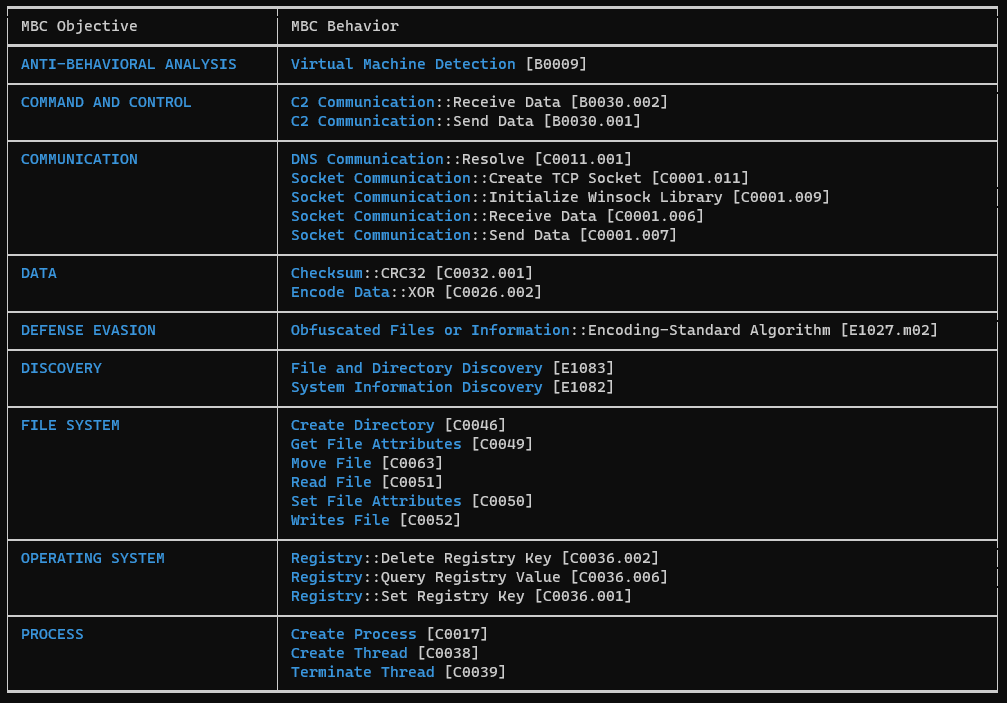
https://raw.githubusercontent.com/AlexsanderShaw/BlogImages/main/img/2023/202309081643361.png

第三部分的内容主要是 Malware Behavior Catalog 的内容,该标准类似于 ATT&CK 框架,对程序的动态行为特征进行了分类整理,来描述样本的执行情况,可以看作是 ATT&CK 的一种补充。

第四部分
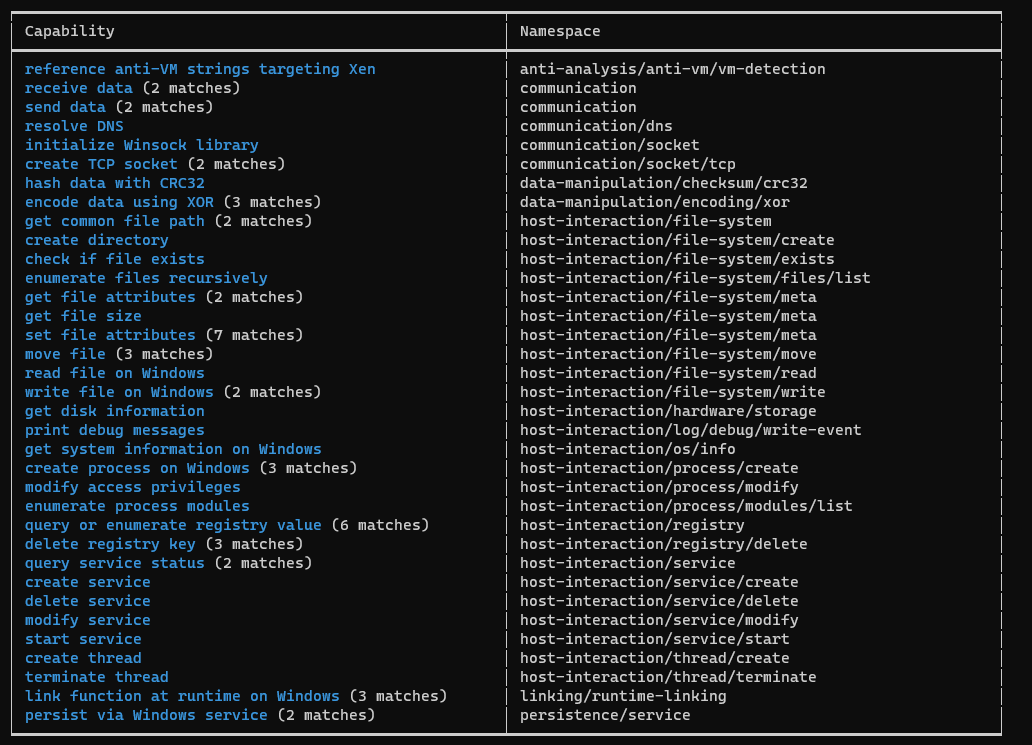
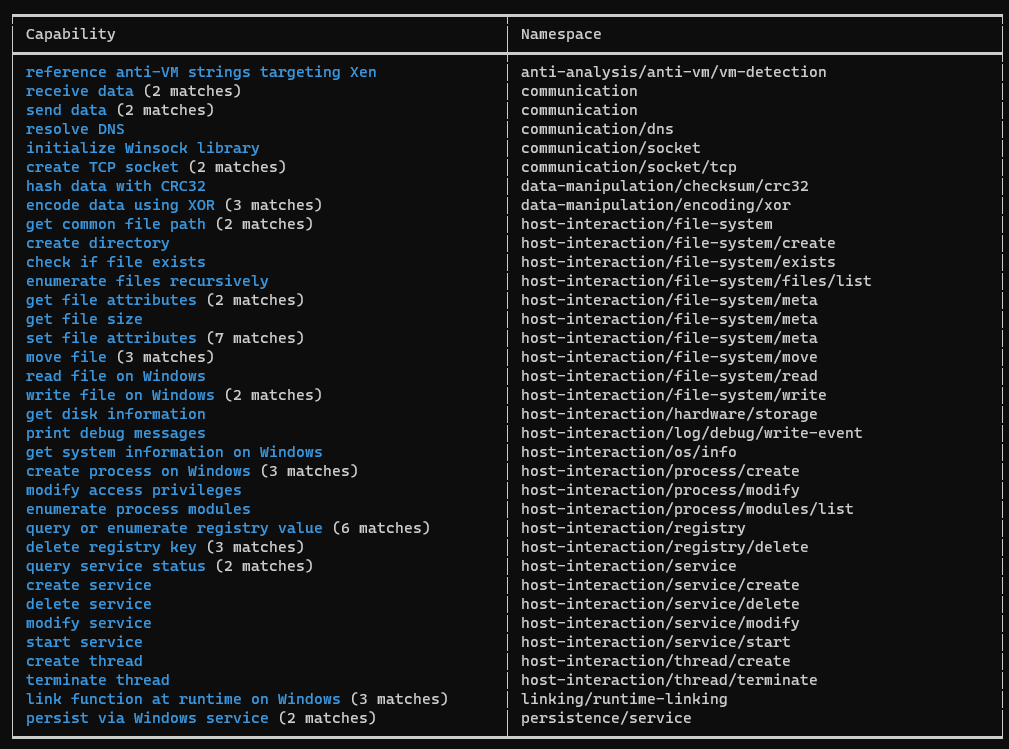
https://raw.githubusercontent.com/AlexsanderShaw/BlogImages/main/img/2023/202309081641156.png

最后一部分则是描述样本的一些 capability ,并且会统计显示出不同数量的匹配。

v/vv的详细输出

在使用 -v 参数的情况下的输出:
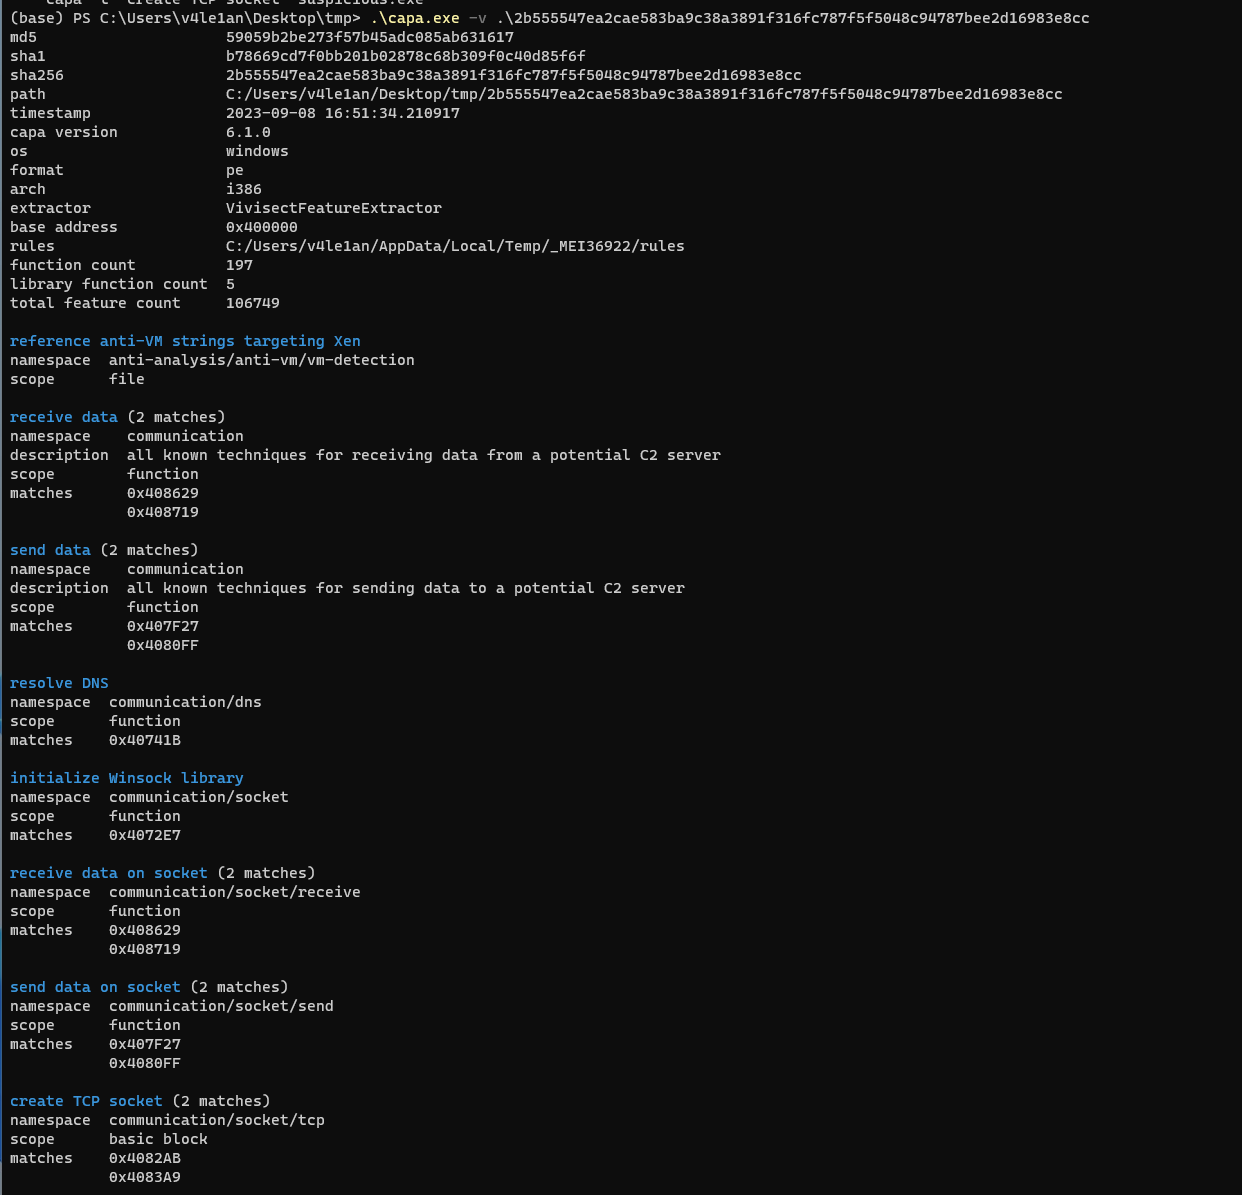
https://raw.githubusercontent.com/AlexsanderShaw/BlogImages/main/img/2023/202309081652408.png

会给出匹配到的具体的项目,例如function或者basic block,同时,会给出匹配到的具体的code address。

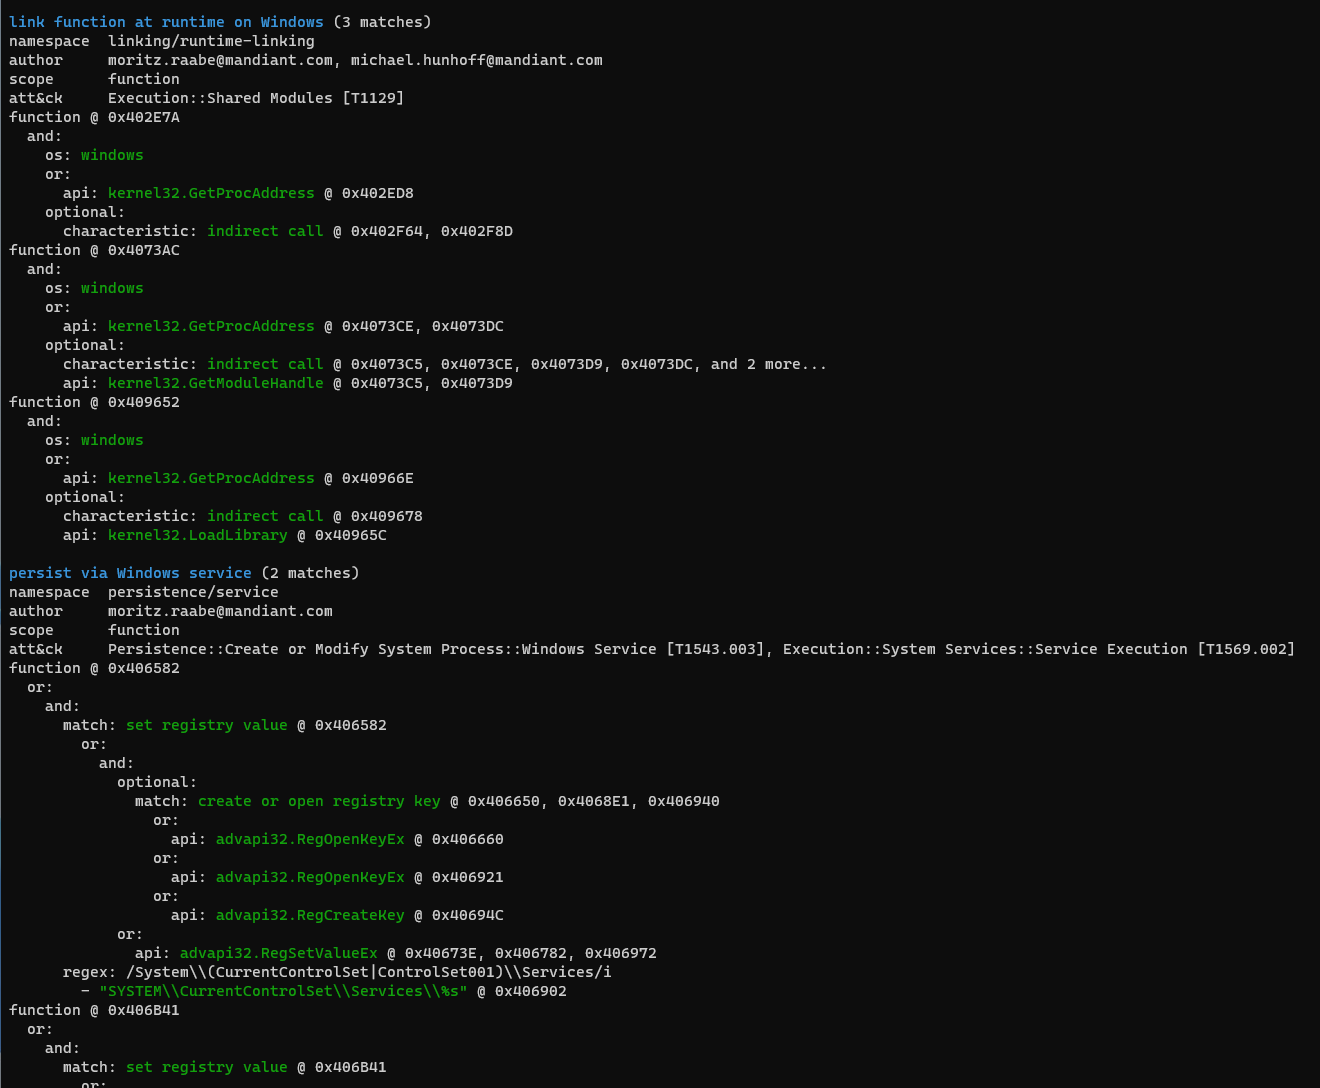
如果是使用 -vv ,则会给出更为详细的信息:
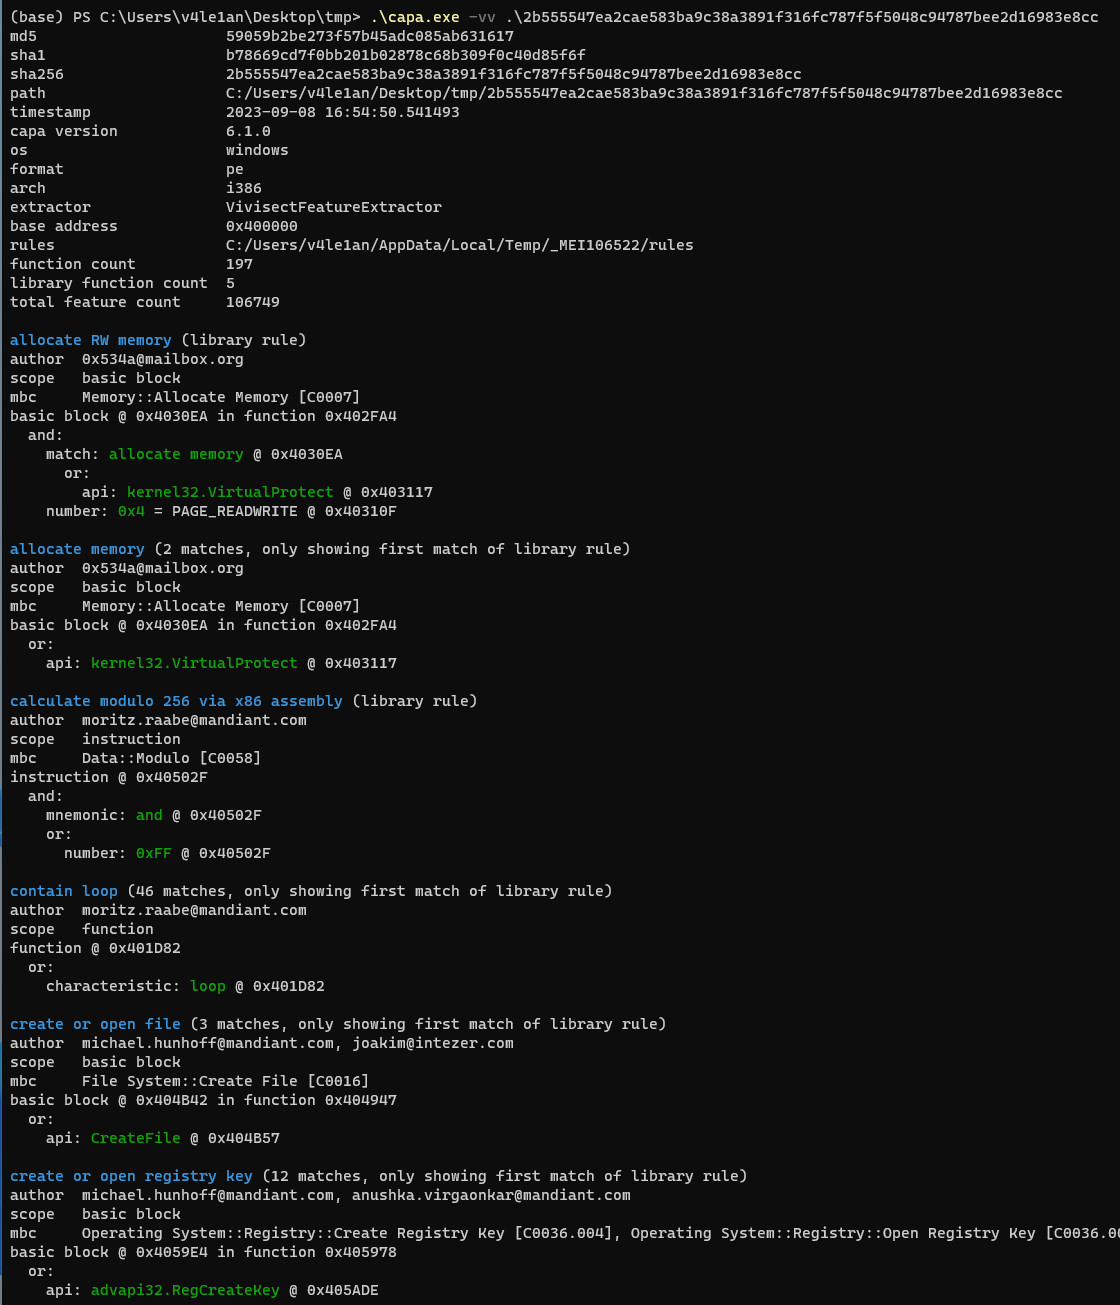
https://raw.githubusercontent.com/AlexsanderShaw/BlogImages/main/img/2023/202309081658070.png

https://raw.githubusercontent.com/AlexsanderShaw/BlogImages/main/img/2023/202309081659628.png

可以看到,会给出具体的att&ck的描述、id等等,还会给出嗲用的api的名字、地址等等。

json格式输出

json格式的输出信息完整度和使用 -vv 参数一致,但是会以json格式输出,默认输出到 STDOUT,如果想保存到文件,则需要重定向到文件。输出的json文件结构如下:
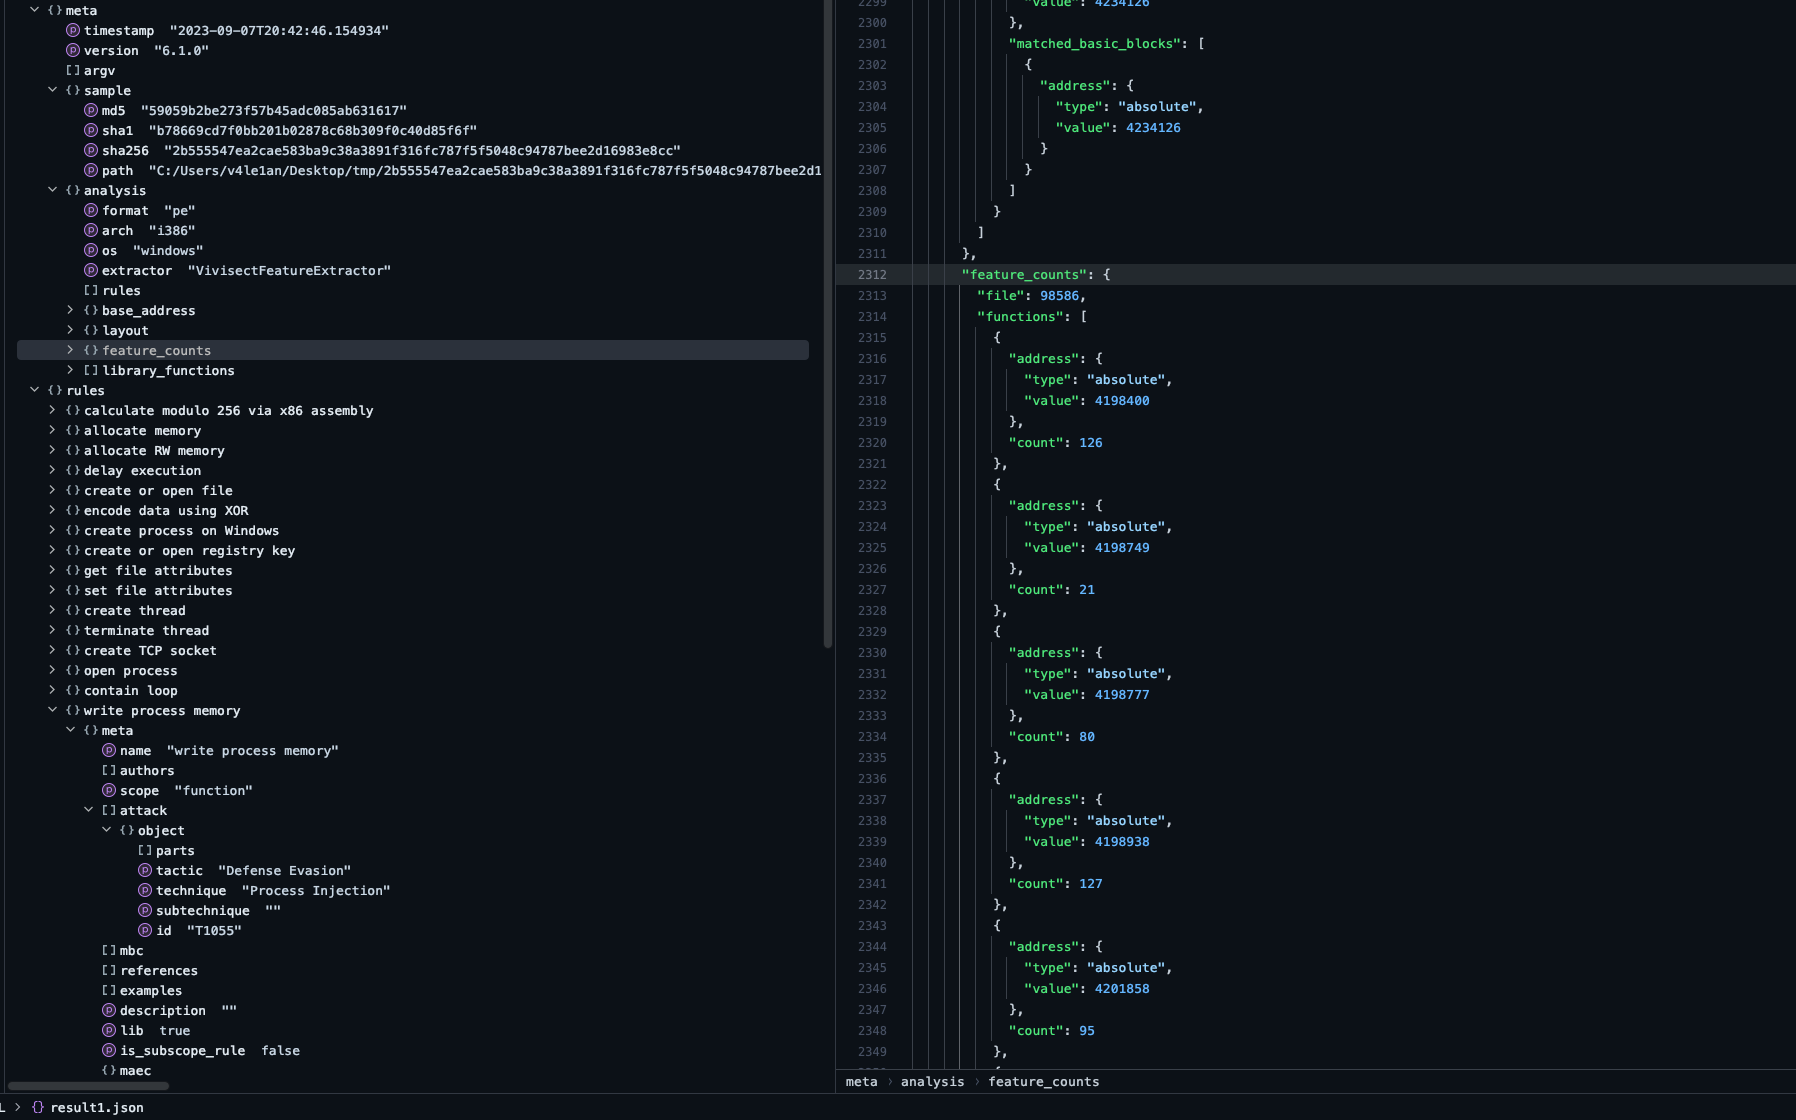
https://raw.githubusercontent.com/AlexsanderShaw/BlogImages/main/img/2023/202309081703893.png

使用json格式的结果输出,我们可以对其进行更多的操作,比如批量提取字段等。

IDA Pro capa插件使用

安装

在capa的git下载下来最新的code,需要注意其中会包含capa-rules和capa-test子项目,前者是capa的分析规则,后者是capa搜集的测试用例。如果不需要测试用例,可以单独下载capa和capa-rules即可。

1
git clone --recurse-submodules https://github.com/mandiant/capa.git

下载下来之后,使用pip3 install -e [path_to_capa]进行安装即可,这里的pip3需要是IDA使用的那个pip3。

使用

安装完成之后,在python的scripts目录下会多一个capa.exe:
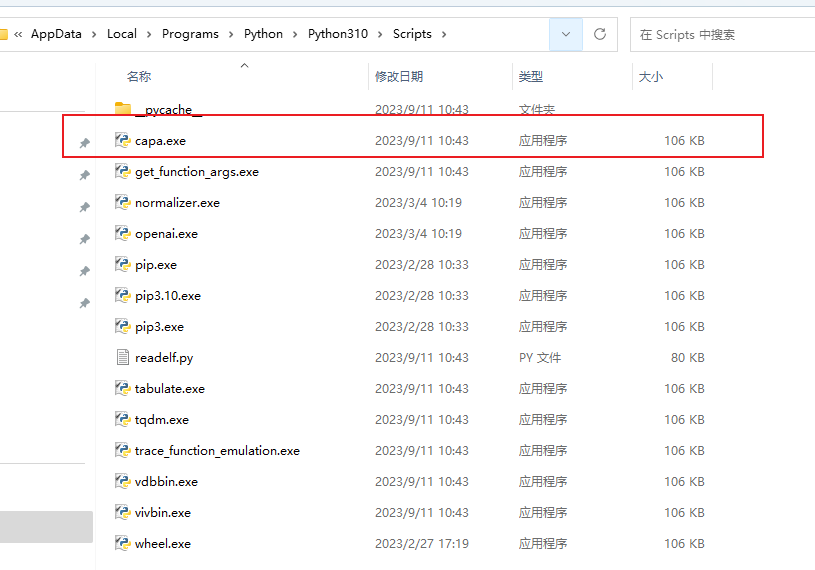
https://raw.githubusercontent.com/AlexsanderShaw/BlogImages/main/img/2023/202309111058848.png

此时就可以在IDA中使用了。

如果安装顺利,安装完成后,在IDA的Plugins下就会看到该插件了:
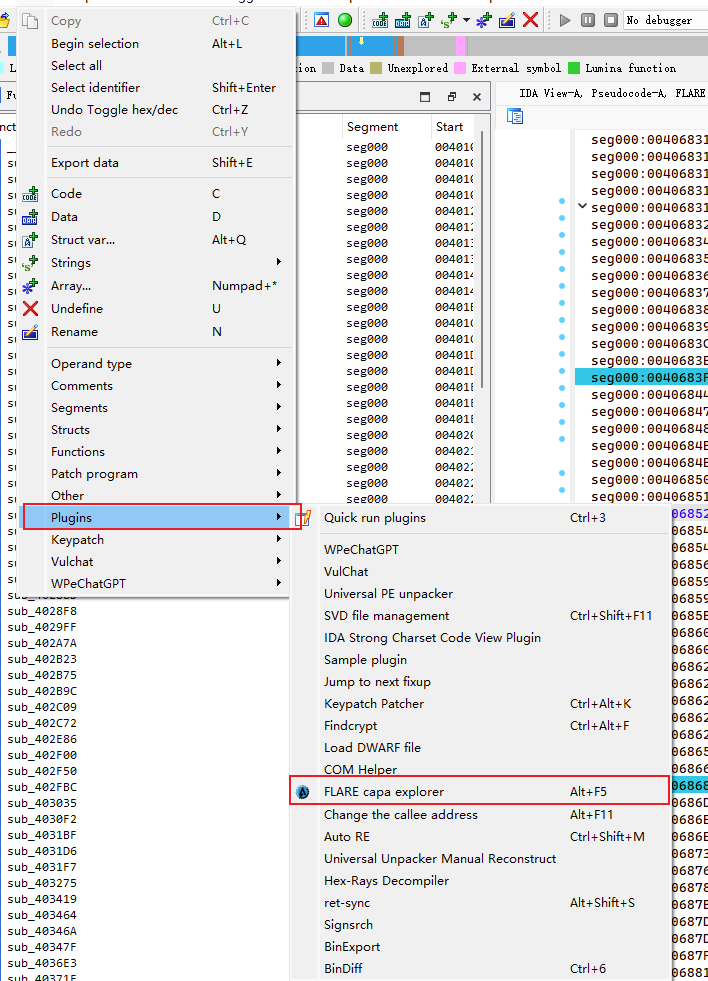
https://raw.githubusercontent.com/AlexsanderShaw/BlogImages/main/img/2023/202309111059029.png

也可以直接Alt + F5快捷键打开插件。

默认情况下,IDA分析完程序capa是不自动进行解析的,而且可以设置是否加载缓存的分析结果:
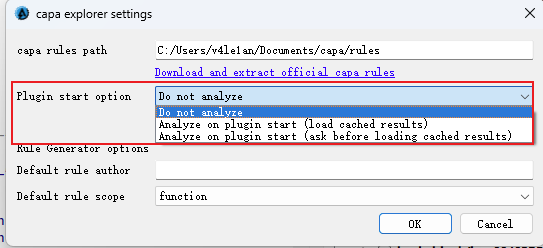
https://raw.githubusercontent.com/AlexsanderShaw/BlogImages/main/img/2023/202309111102380.png

第一次打开插件窗口,需要指定rules目录,可以是官方的rules,也可以是自己开发的rules,指定完之后,capa开始根据rules进行程序分析,分析结果如下:
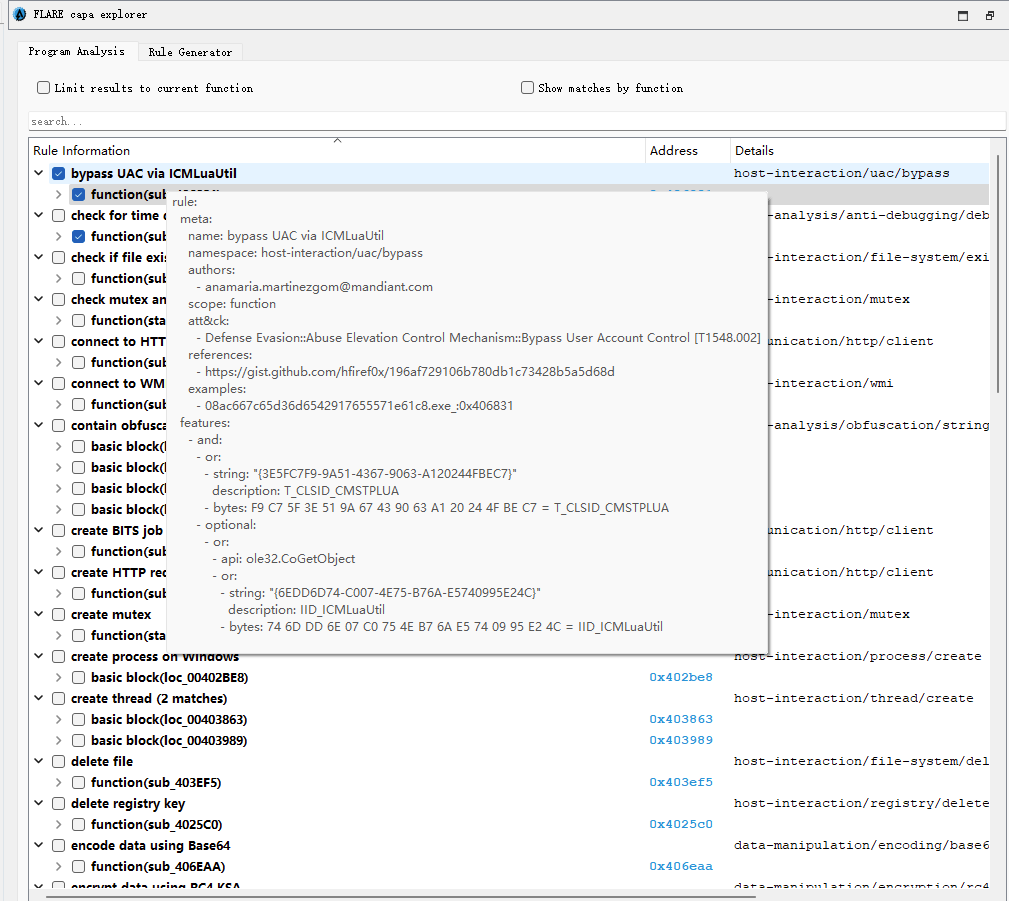
https://raw.githubusercontent.com/AlexsanderShaw/BlogImages/main/img/2023/202309111054317.png

在对应的匹配项上悬停鼠标,会显示出对应的rule。

此外,双击address,IDA会自动跳转到恶意代码相应的位置,并且会高亮显示选中的规则对应的代码:
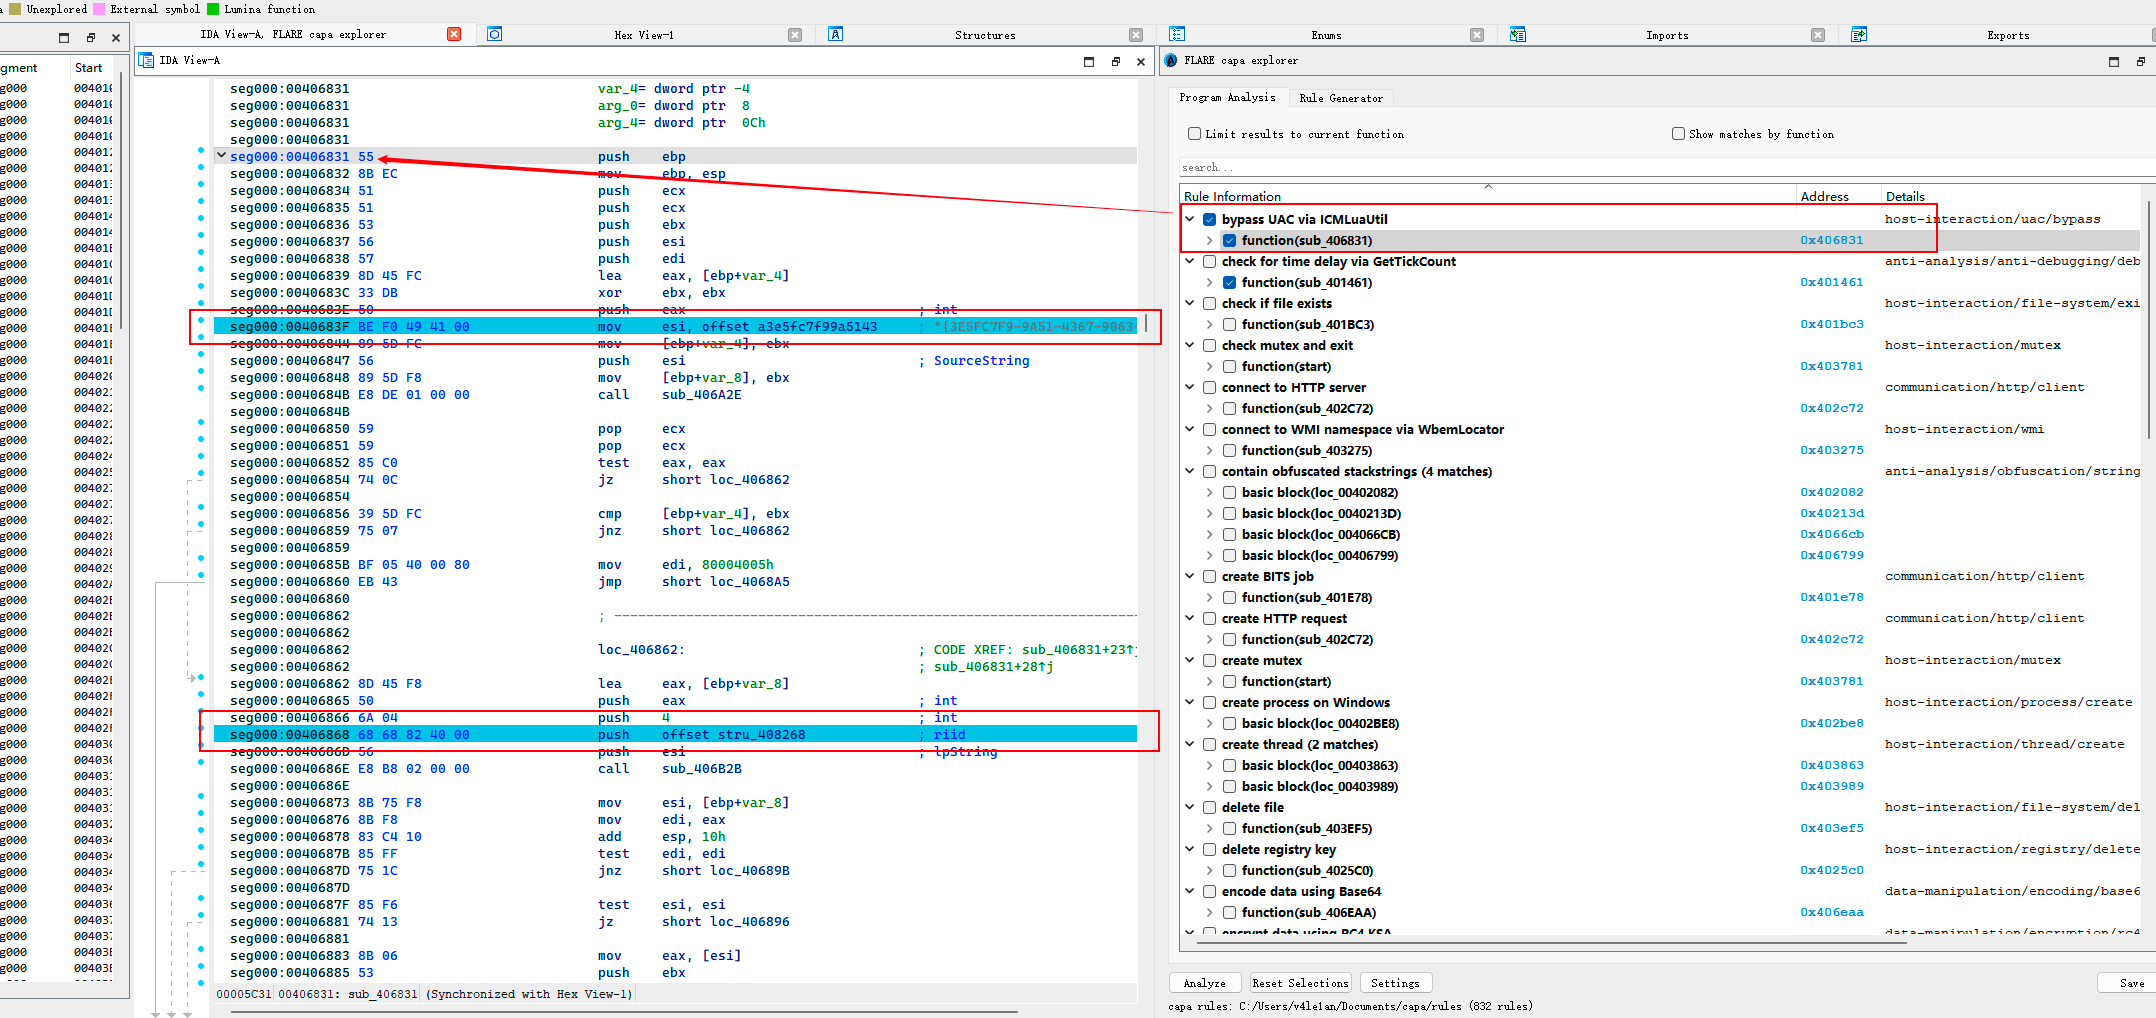
https://raw.githubusercontent.com/AlexsanderShaw/BlogImages/main/img/2023/202309111104319.png